domingo, 27 de noviembre de 2011

Tutorial flor de encaje

Os presento un tutorial para hacer una flor de encaje que hice para Descrapbooking, podeis descargarlo aquí!

I made a tutorial for this flower for Descrapbooking, you can download it here!


jueves, 24 de noviembre de 2011

LO Joy of living

He tenido algunos problemas para poder hacer fotos de los trabajos porque he estado cambiando muebles y con todo patas arriba, pero por fin he conseguido ponerlas al día! Y el primer trabajo atrasado que os muestro es esta página que hice para mi madre hace unas semanas, usando la paleta #82 de The Color Room

I've not been able to make photos because I've been remodeling some rooms and my home was a mess,but finally it's done and I did the photos. This is a layout I made for my mother a few weeks ago using palette #82 from The Color Room

lajol


Los papeles son de Bo Bunny (Sophie), Melissa Frances, Crate Paper (Emma's shoppe) y MME (lost & found). He usado una troqueladora de bordes de Martha Stewart, una cuchilla ondulada para la cizalla Cutterpede y he envejecido los bordes con el distressador de Tonic Studios y tinta distress Vintage Photo. Además he embosado uno de los papeles con la big shot.

Papers are from Bo Bunny (Sophie), Melissa Frances, Crate Paper (Emma's shoppe) and MME (lost & found). I used a Martha Stewart border punch on some papers, a scallop blade for my Cutterpede and I also distressed the edges with a paper distresser and Vintage Photo ink. Besides, I embossed a paper with my big shot.
lajold5
lajold4
lajold3

Las flores rosas y moradas las hice con el troquel Rose Creations de Donna Salazar para Spellbinders ¡me encanta ese troquel! Y a las moradas les añadí unos mica flakes para darles brillo. La flor azul grande es de Petaloo y las pequeñas de ZVA.

I made the pink and purple flowers using Donna Salazar's Rose Creations die for Spellbinders, love it! And added some mica flakes to the purple ones...so sparkly! The big blue flower is from Petaloo and the small ones from ZVA.
lajold2
lajold1
La jaulita es un troquel de Marianne Designs . Usé tres capas para hacerel falso chipboard y lo pinté con liquid pearls plateado. Los brillantes son de Kaiser Kraft.

El arabesco de la izquierda está hecho con la cricut. Lo corté 4 veces y pequé todas las capas, lo entinté con dos tonos de tinta colorbox y le di una capa de Mod Podge Dimensional Magic.

El pavo real es un rubon de Basic Grey (colección Eva).

The birdcage is a Marianne Designs die. I cut used 3 layers to make faux chipboard and painted it with silver liquid pearls. The bling is from Kaiser Kraft.

The flourish on the left was made with my cricut. I cut it 4 times and glued all the layers, then inked them with two colors of colorbox ink and applied a coat of Mod Podge Dimensional Magic.

The peacock is a Basic Grey's rubon (Eva collection).


lunes, 7 de noviembre de 2011

Mini album 26

Este album se lo regalé a mi chico por su 26 cumpleaños. Tiene fotos suyas y de su familia hechas el mismo día del cumpleaños en la celebración familiar. Aunque mucho me temo que me tocará hacer otro con las fotos de la fiesta con amigos!


I made this mini album for my boyfriend. It has the photos of his 26th birthday, but only the ones with his family. I'll have to make another one for the photos of the party with his friends!
MCportada

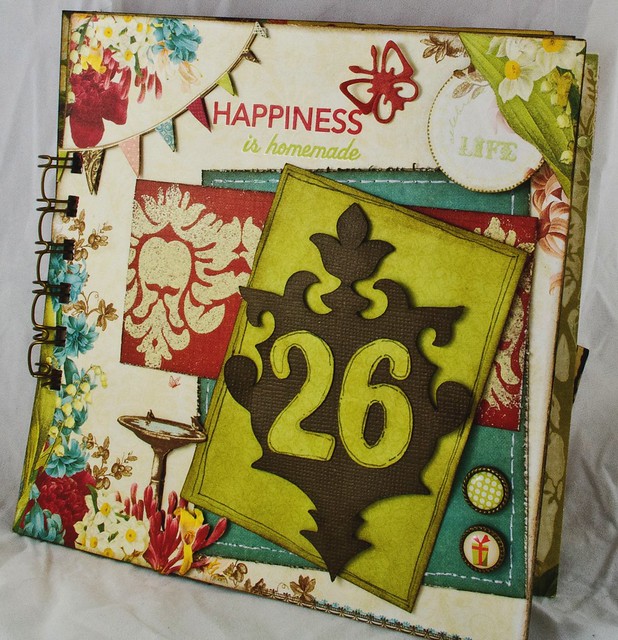
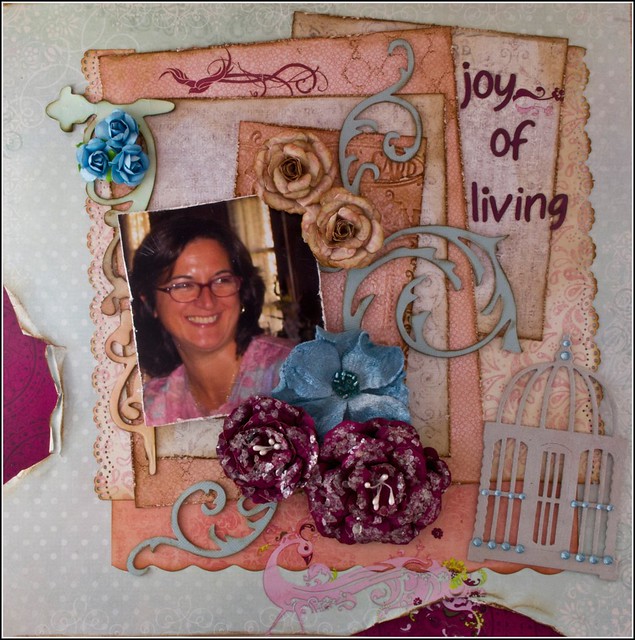
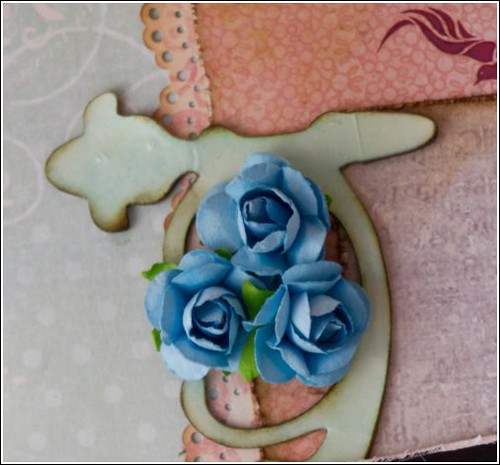
Utilicé un pad de 6x6 de webster's pages que traía dos hojas de cada, de modo que en la portada rwcorté una de las hojas para superponer algunos de los motivos. Los números y el marco están recortados con la cricut, la mariposa es un troquel de Marianne Designs y los brads son de Basic Grey.

I used a 6x6 paper pad from Webster's Pages that had two sheets of each design, so I did some fussy cutting on one of the sheets and layered the cutouts. The numbers and frame were cut with my cricut, the butterfly is a die from Marianne Designs and the brads are Basic Grey. 
MCpaginas12-2

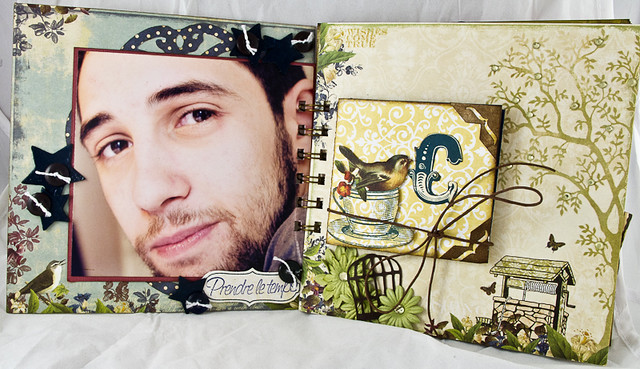
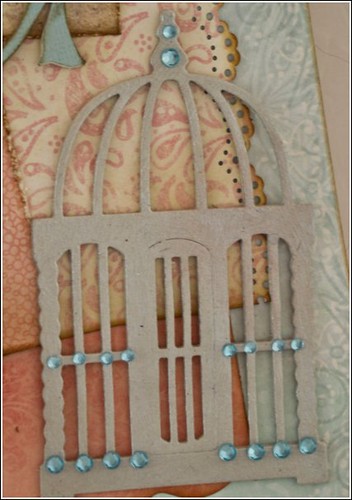
Las estrellas están recortadas con la cricut y pintadas con acrílica azul. El cartelito es un die cut de MME con un sello de Toga. En la siguiente página el desplegable  tiene un pajarito y una letra C (de Carlos)  recortados de un papel de Webster's Pages de 12x12. Las flore son de Prima y la jaula está hecha con la cricut.

The start were cut with myu cricut and painted with acrylic paint. The banner is a MME die cut with a Toga stamp. On the next page the bird and the "C" (from Carlos) are cutouts from a Webster's 12x12 paper. The flowers are primas, and the birdcage was made with my cricut. 
MCpaginas34
22102011-IMGP6585

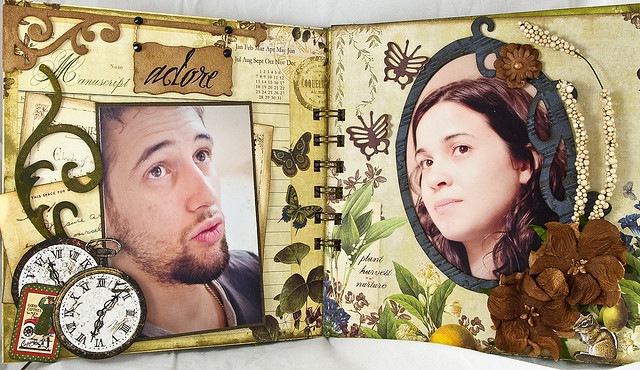
Página de la izquierda: los relojes son recortes de Bo Bunny (Timepieces) y el pequeño tag es de G45 (A Proper Gentleman). El arabesco está recortado en cartón con la big shot y entintado con glimmer mist en varios tonos. El poste superior está hecho con un troquel de spellbinders (Elegant Posts) pegando varias capas para darle grosor, y entintando con distress brushed corduroy. El cartel está hecho de la misma forma, y lleva un rubon.

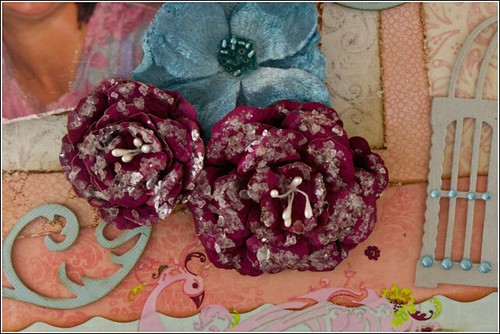
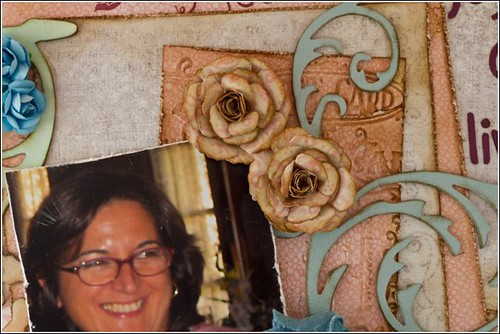
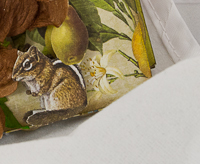
Página de la derecha: El marco está recortado con la cricut y embosado con la big shot (la carpeta es music de sizzix). Las flores grandes son de Petaloo, las pequeñas de Prima y todas están pulverizadas con un mist casero. Las mariposas son de un troquel de Marianne Designs, y la ardillita está recortada de uno de los papeles.

Left page: clocks are cutouts from a Bo Bunny Timepieces paper, and the small tag is from G45. The flourish was made with a Tim Holtz die for big shot, I cut it in chipboard and misted with glimmer mist in different tones. The post is a die from Spellbinders (Elegant Posts). I cut ut 4 times and glued them to make faux chipboard. Then inked it with distress ink brushed corduroy. The banner was made with my cricut and the word "adore" is a rubon.

Right page: I used my cricut to cut the frame and embossed it with my big shot (used the "music" folder). Big flowers are from Petaloo  and the small one are primas, all of them were misted with a homemade mist. Butterflies were made with a Marianne Design's die, and the small squirrel is a fussy cut from the papers. 
MCpaginas45
22102011-IMGP6602

22102011-IMGP6600
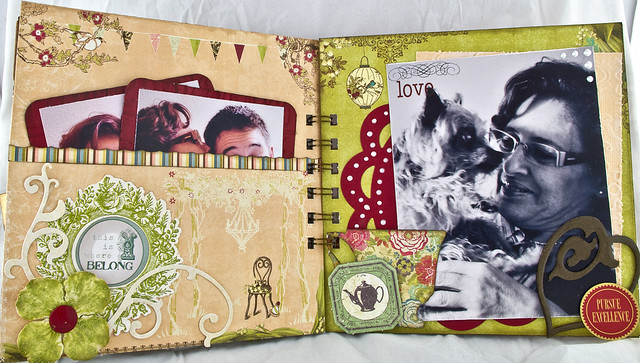
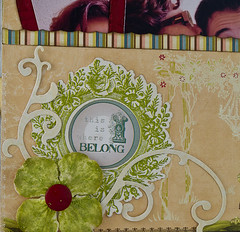
Página izquierda: Dentro del bolsillo hay dos tags con fotos embosados con la big shot. Las pegatinas son de Echo park (Victoria Garden), los arabescos están hechos con la big shot y troqueles de Marianne Designs, y la flor es de prima, entintada con peeled paint y stickles.

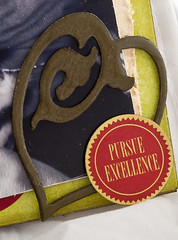
Página derecha: la blonda está hecha con un troquel de Marianne Designs, y añadí unas perlas hechas con liquid pearls. La cartulina beige está embosada con la big shot. La taza y la imagen de la tetera son chipboards de Crate Paper. El corazón está hecho con la cricut, lleva glossy accents, aunque no se aprecia mucho en la foto, y la pegatina es de 7 gypsies. En la foto puse dos rubons y perlas hechas con liquid pearls.

Left page: There are two embossed tags inside the pocket. The stickers are from Echo Park (Victoria garden). The swirls were made with Marianne Design dies and the flower is a prima hydrangea. I inked it with peeled paint distress ink, and applied stickles. 

Right page: the doilie is a die from Marianne Designs, and I added some perlas made with liquid pearls. The cup and the teapot are chipboards from Crate Paper. The heart was cut with my cricut and glossy accents (you cannot appreciate it in the photo), and the sticker is from 7 gypsies. I added two rubons and some pearls (made with liquid pearls) to the photo.

22102011-IMGP6608
22102011-IMGP6613
22102011-IMGP6615
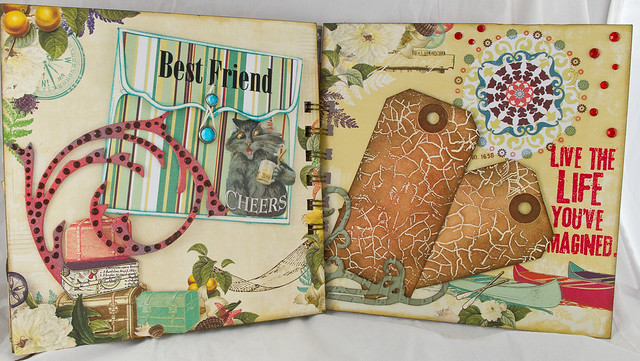
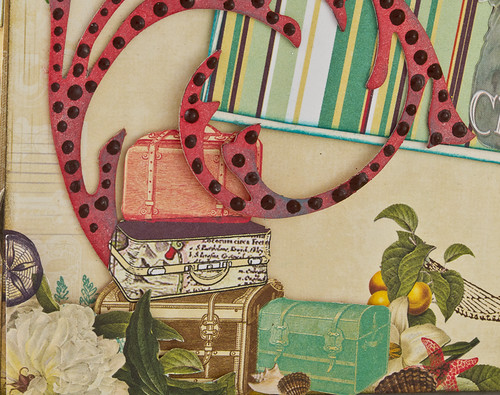
Página izquierda: el sobre está hecho con la cricut, el gatito es de Craft Secrets y los brads de MME. El arabesco es un troquel de Tim Holtz para Sizzix, está entintado con tinta distress Barn Door y tinta colorbox turquoise, y le puse perlas hechas con un Pearl Pen de Viva Decor. Las imágenes de la parte inferior están recortadas de la otra hoja que traía el pack y superpuestas con distintos volúmenes.

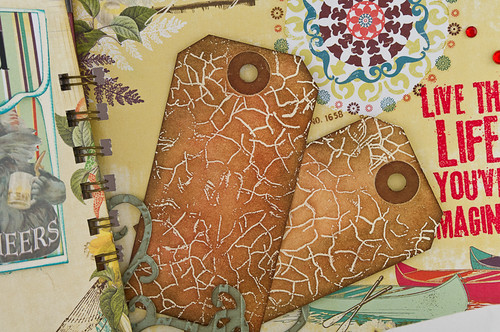
Página derecha: los tags están entintados con distress de varios tonos, y usé la técnica del resist (podeis ver un tuto aquí o aquí) con un sello de fondo craquelado. La frase "live the life you've imagined" es un sello de Tim Holtz embosado con polvos rojos de Stampendous. Los brillantes son de Kaiser Kraft, y el rubon es de Fancy pants.

Left page: the envelope was made with my cricut, the cat is a Crafty Secrets sticker and the brads are MME. The flourish is a Tim Holtz die for sizzix, I inked it with distress ink Barn Door and Colorbox ink Turqoise, and the added pearls with a Pearl Pen from Viva Decor. I did lots of fussy cutting with the suitcases and flowers. 

Right page: I did the resist technique and inked the tags with lots of different tones (you can see the resist technique here and here). The phrase "live the life you've imagined" is a Tim Holtz stamp embossed with red embossing powder (stampendous). Crystals from Kayser Kraft and rubon from Fancy Pants.


miércoles, 2 de noviembre de 2011

Banderines halloween/ Halloween banner

Me encanta halloween, y estoy muy contenta de que cada vez se celebre más. Los disfraces, los dulces y la decoración...¡me chiflan! Para decorar mi casa me decidí por unos banderine muy sencillitos, como podeis ver en la foto.

I love halloween and the fact that we're getting used to celebrate it in Spain too. The sweets, customes and decoration...love it! This year I decided to make a simple halloween banner, as you can see in the photo.


29102011-IMGP6622

Para hacer la base, es decir, los banderines, utilicé cartulina negra y blanca. Recorté los dos triángulos (el normal y el de borde con forma de galleta) seis veces, una para cada letra.

Entinté todos los banderines de  cartulina blanca con tinta distress “rusty hinge” (esto lo hice porque no tenía ninguna cartulina naranja a mano y decidí crearme mi propio fondo). Con la cricut recorté en acetato algunas siluetas de halloween (murciélagos, bruja…) y las utilicé como máscaras sobre mis banderines. Después estampé algunos sellos con versamark y los embosé con polvos blancos.

I made the bases cutting black and white cardstock with my cricut (six scalloped triangles and six plain ones).

I inked all the white triangles with distress ink "rusty hinge" since  didn't have orange cardtock. Then I cut some halloween shapes in acetate with my cricut and used them as masks. Finally I stamped a crakle background stamp and a spider web stamp with versamark and embossed them with white powder. 
29102011-IMGP6624

Las círcuos en los que están letras también los recorté con la cricut, usando papeles de Basic Grey (de la colección Eerie. Para hacer las letras recorté el mismo motivo tres veces en cartulina negra y los pegué, de modo que pareciesen hechas de chipboard, y además les eché glossy accents para darles brillo.

La araña está cortada con la cricut y lleva stickles, el fantasma es un recorte de un papel de G45 "wizard of oz".

The circles were cut with my cricut, using Basic Grey Eerie's collection papers. To make the letters, I cut three times each one and glued them to make faux chipboard letters; and  applied glossy accents. 

I used my cricut to make the spider and decorated it with stickles. THe ghost is a cut out from a G45 paper ("wizard of oz" collection).
29102011-IMGP6626
La frase "happy halloween" es un sello de inkadinkado embosado con polvos negros.

The phrase "happy halloween" is an inkadinkado stamp embossed with black powder.


29102011-IMGP6628
El caldero está hecho con la cricut, recortando varias veces el mismo motivo y pegándolo.

I made the cauldron with my cricut, using the faux chipboard technique. 
29102011-IMGP6630

EL murciélago es una pegatina de basic grey, y el espantapájaros un recorte de un papel de G45.

The bat is a basic grey sticker, and the scarecrow a cut out from a G45 paper. 
29102011-IMGP6631


La araña es un sello de inkadinkado.

The spider is a stamp from inkadinkado. 
29102011-IMGP6633


Corté el cuervo con la cricut y le di una capa de pintura craquelada transparente (rock candy). El ojo lo hice con liquid pearls.

The raven was cut with my cricut and painted with rock candy crackle paint. I made the eye with liquid pearls.